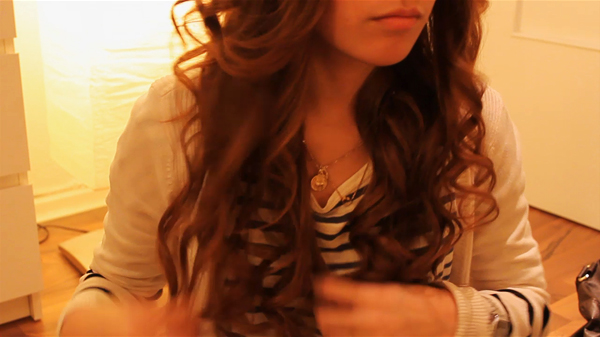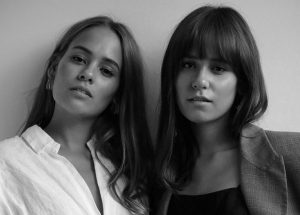
Ich habe für euch mal wieder ein Schmink-Tutorial vorbereitet! Diesmal liegt der Fokus auf den Augen. Und dort dreht es sich um den Trend, den uns die Spring/Summer 2013 Shows in New York, London, Mailand und Paris für dieses Jahr vorausgesagt haben: Schwarz auf Weiß!
/I prepared another make-up tutorial for you guys! This time the main focus is on the eyes. And there it’s all about this year’s trend we could see all over the runway at the Spring/Summer 2013 Fashion Weeks in New York, London, Milan and Paris

Für alle, die den Vorher-Nachher-Effekt genauso lieben wie ich, hier erstmal ein Bare-Face-Moment!
/For everybody who loves the before-and-after effect as much as I do, here comes a bare face moment!

Ich kümmere mich zunächst um eine perfekte Base aus Foundation, Concealer und Highlighter. Da der Lidschatten später schimmert, solltet Ihr darauf achten, dass Euer Highlighter nicht zu sehr glitzert. Hier habe ich „Le Teint Touche Èclat“ von Yves Saint Laurent benutzt sowie den passenden Highlighter-Pen, den Artdeco „Camouflage Concealer“, und Benefit’s „Erase Paste“ für unter die Augen.
/First we work on a perfect base of foundation, concealer and higlighter. Make sure that your highlighter is not too sparkling since the eyeshadow will be quite shimmery already. Therefor I used Le Teint Touche Èclat from Yves Saint Laurent along with the highlighter epen, my Camouflage Cream from Artdeco and Benefit’s Erase Paste any dark circles.

Meine Augenbrauen fülle ich mit einem Augenbrauen-Puder von Essence auf und bürste sie anschließend durch.
/With some eyebrow powder from Essence I fill in my eyebrows and comb them through.


Nun zum Lidschatten. Ich verwende „Les 4 Ombres“ von Chanel in der Farbe „93 Smokey Eyes“*. Das Quartett bietet sich für diesen Look geradezu an! Als Erstes trage ich die weiße Farbe großzügig auf das ganze Lid auf.
/Now on to the eyeshadow. I’m using Les 4 Ombres from Chanel in „93 Smokey Eyes“*. This eyeshadow quad is simply perfect for this look! At first I apply the white shade all over my eyelid.


Dann greife ich zum helleren Grauton. Mein Tipp: Ich mische Lidschatten gerne mit dem „Fix+“ von MAC – die Farbe wird dadurch um einiges intensiver! Das metallisch-glänzende Grau trage ich am äußeren Augenwinkel auf. Da ich kein großes Lid habe, sieht das Ergebnis besser aus, als wenn ich die Lidfalte schattieren würde.
/Next is the light grey shade. My tip: Mixing your eyeshadow with Fix+ from MAC will make the color much more intensive. IThe grey now appears more metallic. I apply it on the outer corner of the eye. Since I don’t have a big lid it looks much better that way than shadowing the crease of the eye.

Für mehr Tiefe trage ich ganz außen noch den dunkleren Grauton auf. Um das Auge zu öffnen, greift zum Weiß und gebt es in die inneren Augenwinkel und unter die Augenbrauen.
/For more depth take the darker grey shade and apply it on the very outer corner of the eye. To make the eyes pop put on some of the white eyeshadow in the inner corners and under the brow bones as well.


Nun folgt ein feiner Lidstrich mit dem „Eyemazing Liner“ von Manhattan. Der Lidstrich verläuft nur bis zur Mitte des Wimpernkranzes, das kaschiert eng stehende Augen. Anschließend die Wimpern kräftig tuschen! Ich habe mich dagegen entschieden, den schwarzen Lidschatten zu benutzen, da bei der Kombination mit Weiß und meiner Handfertigkeit zu hohes Panda-Augen-Risiko besteht.
/Next up is an eyeliner from just the center of the eye with a tiny flick at the end. That will make narrow eye appear more apart. Afterwards put on a lot of mascara! I didn’t use the black eyeshadow of the quad because with my skills and in combinastion with the white eyeshadow I didn’t want to risk having those panda eyes at the end.

Als Letztes sind Rouge und Lippenstift an der Reihe. „Melba“ (mattes Finish) von MAC und ein Lippenstift von Topshop in „Desert“ – beide in einem Peach/Apricot-Ton – sorgen für ein wenig Farbe, ohne zu dominieren.
/Lastly out on some rouge and lipstick. „Melba“ (matt finish) from MAC and „Desert“ lipstick from Topshop – both in a peachy/apricote color – will provide the pop of color without beijng too dominant.

Et voilà! Ein simples gar alltagstaugliches Augen-Make-up. Ein Fan von komplizierter Lid-Bemalung bin ich ja nicht, wie ihr wisst. Ich hoffe, Euch gefällt’s!
/Et voilà! A simple eye make-up for daytime even. As you all know I am not fan of super complicated make-up work on the eyes. Hope you guys like it!
PS: Dieses Tutorial war im Übrigen unser erster Beitrag als Gastbloggerinnen auf Two-for-Fashion. Dort könnt ihr in Zukunft auch weitere Posts von uns finden!
Written by Nisi
März 29th, 2013 04:15 pm. Comments


